Thursday, 28 March 2013

Talk about being clever!

Well I tried anyway.


I decided to tart my blog up and couldn’t because the template I had used was a weird one and I couldn’t work out how to remove it. So it now looked all wrong and I wanted a new look so I have started a new one at http://allthingspapertoo.blogspot.co.uk/  

not sure I totally like it yet and I can’t get the header right so I might spend some time designing one.


All future posts will be there so I hope to see you soon.

Monday, 18 March 2013

My bird box

Finally I got this done.


DSCF0803


I gave it a base coat sometime last year and then couldn’t decide what to do with it. Then I got the Graphic45 Birdsong papers and had so much left over that I just knew it was right. I made the flowers by cutting them on my Eclipse, so quick and easy and in any size I want. Then I inked them and put them on the box. the final addition of the bird took some finding. Eventually I found one online but when it arrived it was facing the wrong way, really should wait to assemble all the bits at one time. Still it looks OK, you can’t see the long flowing tail on the bird but it sort of takes off the hard edges of the box.


Other projects are in hand but are taking time as layers have to dry.


Have a lovely day, we are off to London to do a bit of work.

Tuesday, 12 March 2013

A good find

I was looking for something to use the gorgeous Graphic 45 Bird Song papers I had left over from the book and decided I wanted to alter a small set of drawers and make it look like an oriental, black lacquer box. I hunted everywhere for something in wood or MDF but nothing seemed right. Then I popped into one of the charity shops in town and there it was. A wooden jewellery box with 3 drawers and a pull down each end with dingy foam in them, supposedly to take rings. shame I didn’t take any pics before really but it was just a darkish wood all over with tatty handles.


Plan of action was to take off the handles, easy peesie!  they just pulled off. Then give everything a gentle sand and paint it with black acrylic as a bas. That went fine and 2 coats of paint later it looked so different.


The drawers had moulding on them so I highlighted the valleys and then cut strips of Bird Song to fit the tops. Originally I was going to stamp the sides and top but when I did one it just didn’t look right so I covered it up with more paper and kept it really simple. The only other things were the handles for the drawers and the inside of the old ring holders. The handles were easy, I had some pearl beads, very traditional in Chinese circles. The ring drawers took some though but I eventually decided on gold stamped images on red. I used a figure and a willow tree on each.


DSCF0797


It now takes pride of place in our living room and, if you look from a distance you could ‘just’ mistake it for a lacquered piece.

Friday, 8 March 2013

Fruit Crates!

Well with artistic license I suppose they are. I found these little boxes at my local store – yes the lovely Artistic Stamper – and knew they were perfect for my herb collection in the kitchen. They are very simply decorated with a base of gesso, some Distress Paint on top. that was left to dry and then I random stamped all over with leaves and flowers. Of course I then had to find something for the small one as it is quite tiny for pots. It is now full of 3 tomato pots which just fit in the top, they are growing on till I can get them in the greenhouse. The pot cover on the big one in the middle needs some attention and I see some red and hot as it holds a chilli plant.


DSCF0794


Goodness I have just noticed the sun was trying to shine, a sign of better things to come.


Have a lovely day, we are off to Heathrow this afternoon to drop a neighbour who is off to Australia for 3 weeks –think I am jealous.

Tuesday, 5 March 2013

Third time lucky!

I have tried twice to post this in the last couple of days, using my iPad, but nothing wanted to work so it is back to the PC and something I know will work.


I know it is nearly 6 months since I last posted, things have been hectic and for several months I didn’t do much craft at all. I am back to it now though and have been for a while so time to catch up. This will a bit random so bear with me.


Where to start – well Christmas might be a good place. I didn’t make Jennie’s workshop at The Artistic Stamper but I got the kit and instructions and spent a day later in the workroom and did most of it, final touches were made at home.


OOB1


            OOB2

It was made from a circular wooden base and 3 of the small boxes from Configuration Boxes. Paint, glitter, alcohol inks and all the rest.


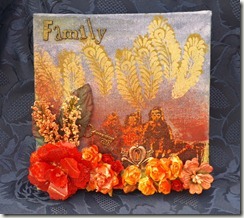
Another workshop was this canvas using the new Distress Paints and some new stamps from The Artistic Stamper, quite unusual colours for me but It brightens up my display.
 

cnavas


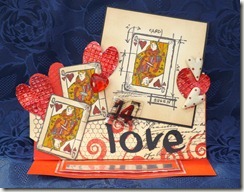
On the Artistic Stamper Creative Team Blog Emma showed her creation and I just loved it – hers is here. I made some minor changes and the card base has curled up where Chris has had it on show for ages (note: must use thicker card if I use this shape again!).
 

valentine


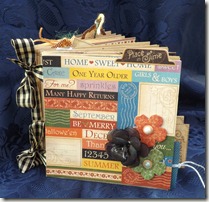
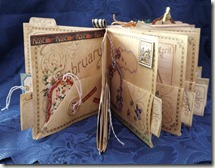
Another workshop was book making using Graphic 45 Place in Time papers. We got a whole pad to play with and, with guidance from Jennie, we put a book together. This is mine with a page for each month and pockets to put things in.
 

graphic 1


     graphic 2


That inspired me to use an MDF book I had covered in gesso some time ago. I have gone a bit oriental at the moment and got the Graphic 45 Bird Song pad and used it on the outside of the box and then made a book to go inside. I also used gold embossing powder on the edge of the book.


book1


        book3

book 2


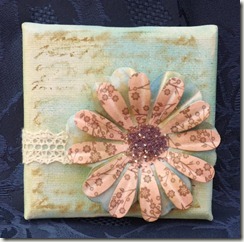
I made a mini canvas which I was quite pleased with, I have another to do but haven’t got any ideas yet.
 

mini canvas


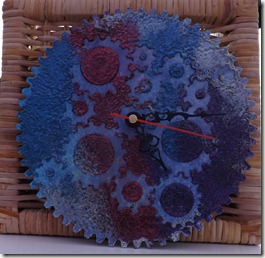
Finally a clock. I got a couple of cog blanks but have only finished this one so far. The finish came about from watching a demo on TV. They were using Dreamweaver Embossing Paste and, as usual, I wasn’t concentrating totally on it – well I was making my book at the time! Anyway they sprinkled something on the paste and then heated it with a heat gun, the effect was really good so I gave it a try. The thing was I used embossing powder and they had used mica powders but in some ways mine finished effect was more dense and vibrant as they only put a little of the mica n the paste. It does take some heating and really needs one of the long thin heat guns that runs faster than the gun shaped ones. Here is the finished one
 

clock


It is just leaning on the basket for now, till I find somewhere to hang it.


Projects in the pipeline are 3 fruit crate pot holders for the kitchen window sill, the other cog base, a larger bird box and an old wooden jewellery box than I am turning into an Oriental box. I will try and post them as they are done and not leave it so long next time.


If you got this far thank you!

Thursday, 6 September 2012

Prima Home show at Bluewater

I was lucky enough to win a pair of tickets to the show which is on this weekend and I went this morning. What a pleasant surprise form the last one I went to, at ExCel some years ago. This was over both floors with the Stitches show upstairs and the paper craft etc. on the lower floor. Firt though I had to get in with just a printed letter, went to the desk n the ground floor - they sent me to Enquiries on the first floor. They then had to check but in the end it was join the queue with the rest and hand over the letter and I was in! As I was now upstairs I browsed round the wools, fancy sewing machine some nearly £5000.00!!!!!, had a look at some quilting and patchwork, chatted to the West Kent WI ladies and generally enjoyed looking. I had already decided that I wanted to get some wool for a project but wanted to get that last so I went down to the other floor and had a browse. I saw Barbara, she was demoing but had time for a quick chat. There was no-one else I knew though. I found a couple of Dreamweaver stencils I have been after for a while and some papier mâché Xmas trees to alter. They came with some napkins but I am not sure if they will both be covers with them. Then it was back upstairs to get some sewing bits I had seen, a needle threaders - in desperate need of that now as I can't see to do it even with my glasses on! I also got a neat light with a magnifier so I can see what I am doing at night as well. Then it was off to get the wool. Right now I am doing this on my IPad and it won't let me add a photo so I will add that to FB separately. There is no wool in the picture because that is for a special project to come later.

Friday, 24 August 2012

Was it worth it?

Well, yes I think it was.


In my usual fashion I went ahead and made some things but never thought about the end result. 2 crocheted cushion covers later and nothing to stuff them with meant out with the measure, put the details on my phone and off to Dunelm to see if I could get anything the right size. After going through all the cushion pads and converting my inches to cm there was nothing in the right size. Then we spotted some ready covered cushions in the sale and one was the perfect size so round cushion sorted. I sill had an oblong one to fill but nothing was small enough so it was a case of get the best and reduce it in size to fit.


before 1


before 2


Before photos, not really my style but so much cheaper than the plain ones !


The fun was reducing the size of the oblong one, I took so much stuffing out of it I have enough to fill another one, and I found some white fabric in my box to make the pad with too. Anyway that is for the future, here are the finished ones and I have to say I really like them both.


after 1


after 2


The next project is underway, some little stars to hang in place of the bunting for the Christmas look, but more on those nearer the time.


On another subject I will be off to the opening day of Jennies new Craft Store and Art Bar tomorrow. I am really excited to see what they have done.

Tuesday, 21 August 2012

We have a new unit all for me!

When Kate’s shop was being closed and lots of the fittings were being sold I managed to get the Ikea unit that had been in the entry porch. I had always loved the way all the things were shown in it, all the workshops and other bits and pieces, and I hankered after something similar as we only have 2 of the four cube sets and they were full of albums. It was perfect but sadly the finish that had worked so well in the shop wasn’t right for the conservatory so, with Chris’s help, it was peeled, sanded and painted white. We then had to wait for someone strong to come and lift it into place.


While all that was going on I was busy crocheting bunting, flowers and a bird to soften it a bit and make it look pretty.


This is the unit with most in place except the flowers, you can just see them on the top left shelf. 20120808_184749


20120821_10214320120821_102150


The flowers are now attached and the bird is hanging. The idea is that the flowers will be swapped with Christmas items when the time comes as I have just tied them in place.


Of course I now need more workshops to go to and make some more things to fill the rest up. At least I have my albums all in one place now!


Finally thanks to Jane for the unit and Kate for trying to get it in the van, it was just too big but we got it organised in the end.

Monday, 16 July 2012

Saturday Workshop

I went to the last workshop at Pickleberry on Saturday. Sadly Kate has closed her shop as she is moving to the Midlands to be with her family. It is great for her as things are all coming together and I am pleased it is, finally. Keeping everything crossed that it goes smoothly now.


Kate has been responsible for creating so many new friendships over the last 3 years and so many people are so grateful that she was near (or far) from them to be able to do that.


OK I will get too gloomy and sad if I continue on that vein so let me show you what we made.


box


Jennie from The Artistic Stamper took us through all the techniques to create this. You can’t see but it is a box with a hinged lid. We painted the outside in a dark colour then stamped and embossed with clear embossing powder. Painted over in a darker colour then waited for it to dry. Once dry we removed some of the paint with a damp cloth to reveal the embossed detail underneath. The we started on the panels. Briefly they are stamped into UTEE, UTEE in a mould, stamped into Terra, metal passed through an embossing folder then alcohol inked, distressed with an embellishment added and finally distressed, stamped and another embellishment added, I have just noticed that my spinner needs to be added to the bottom middle tile.


What a great day, good fun, good company and good laughs.

Busy, busy

I have been making more cushion covers and learned another new crochet stitch. In fact I have changed the way it is shown on the web and found it easier (at least I think so).


The first one is another way of using the wiggly pattern, Instead of working round it is worked diagonally. You will see what I mean - blog 2


It is the one on the right, I have a close up as well which I will post in a minute. The one on the left is my adaptation of crocodile stitch. All the directions online and on You Tube were quite complicated to do but I did do a sample of a couple of rows. Basically they all showed how to do it row by row. Now the stitch is worked on a grid, similar to the wiggly stitch, so I thought I could make the whole grid and use that. Another sample made and it worked so I did it that way. Yes making the grid is tedious but once done it was fine.


Here are close ups of both


blog 4


blog 3

Both were worked in Double Knitting wool and I think they will both wear well.


Off to find the picture of the box I made on Saturday – posting that later.

Thursday, 14 June 2012

Bird Houses

I was looking for something to make/alter and hang in the conservatory along with some other bits and I had a go at a couple of mini bird houses. I am really pleased with them, if I am honest I prefer the green one but there are those that will understand that! Anyway here they are, details to follow.


DSCF0259


DSCF0260


First I painted using the base colour of green or blue then I spread Terra on the roofs and left it all to dry ( there was a lot of waiting to dry!). Then more of the base colour on the roofs. (More drying)


Then it was time to think of embellishments, I had a metal bird which I dipped into alcohol ink, some blue but don’t ask me which one. I also had some metal flowers and they were dipped in a rust alcohol ink and all were stuck on with Glossy Accents. Then came the flowers from the Tattered Flower Garland Sizzix die and some lace edging left over from a class. They were all coloured with Distress Inks. Once assembled it looked as if it needed something else so I found some metallic paste and rubbed on complimentary colours, silver on the green base and copper on the blue.


All in all quite please with the result.


Supplies from Pickleberry or The Artistic Stamper

Saturday, 9 June 2012

Making things

I have been in a productive mood recently and have found something to do while I am watching the TV in the evenings.


We had a crochet lesson at WI a couple of months ago and it reminded me that I can crochet. OK I don’t hold the wool and needle the way you should, I hold it as if I am knitting, but it works for me. I have also found some amazing patterns thanks to Carol (the crochet Queen) and surfing the web. Here are the 3 I have made so far.


DSCF0254

The colours don’t show well here, they are pale pink, pale lilac and a light sage green. This was the first one I made and I need to make another one to perfect the increasing in the inner rounds. I am not sure what the stitch is called but I like to call it ‘shell stitch’.


DSCF0256

I changed the lilac for pale blue for this bobbly one, the first I have made that is square and needed the edges kept straight. this I call loopy stitch as that is what it is created from, loops.


.DSCF0257

Finally my favourite, my cappuccino cushion. this is a 2 stage piece, make a grid then use the grid as a foundation for the ruffles. Once I got the hang of it it was really quick to do.


I also have a grey and white long pillow in the making, using this pattern but it has had to be set aside for a sweater I am making for Michael’s birthday.


I am off to a workshop today at Pickleberry with the lovely Jennie from The Artistic Stamper for a follow up Altered Book day. More pages to add to the one we started a couple of months ago.

Tuesday, 10 April 2012

Cats and eggs

Trying to keep up with current trends I decided to do some basic crochet, and the kat decided to help by playing Cat’s Cradles!

DSCF0222

Took me an hour or more to unravel the knots.


On a more positive note I spent Saturday at Pickleberry altering 6 eggs I got from the 99p shop. I covered them all with gesso a couple of days before and then did something different with each one. From traditional with ribbon and pearls to gilding flakes, metal flowers and leaves, miniature watch parts on a copper dabbered base, large flowers on each side then ribbon round the middle and small flowers all over with pearl centres.


I have had terrible trouble getting the metal leaves to stick. I used epoxy resin in the end and still one fell off when I went to take the photos.

DSCF0225

DSCF0224


Photos aren’t brilliant but you get the idea I think.

Wednesday, 21 March 2012

An altered book workshop

Once again an unusual class at Pickleberry Papercrafts last Saturday.


I was expecting this to be really difficult, along with the others there. Taking a book, tearing out pages, slapping paint and glue on them and cutting bits out was something we all had a problem with. When it came to it though I was able to forget it was a book and treat it like any other supply at a class.


I didn’t have my camera so have had to rely on any pics I could get from elsewhere and, thankfully, Jennie from The Artistic Stamper took one of my double page with tags.


rosemary

Yes that is me hiding behind it too.  As always I hate my photo being taken and people do try so hard!!!


This bit of the book took 8 pages, stuck together in pairs then the centre 2 folded to make the pockets. Inks, Jennie’s new stamps, tissue tape and spritzed water gave the effects.


I am looking forward to adding some more at a later date.


I am now doing Tim’s online class, though I am not doing the physical side of it as I am having to be careful with my shoulder. I am watching the videos and printing out the PDFs. I am loving the videos even though I have done a fair bit of what has been covered so far, there are still new bits, or bits I haven’t picked up on before.


Now I need to do some proper work!

Monday, 5 March 2012

Birthdays

We have 4 birthdays from the end of February to the 5th march, 2 grandsons, daughter and daughter in-law so the card factory is in production about this time. The boys didn't get anything too special but the girls got these.
I made them a while ago but couldn't post till today, by the time this gets published they will have seen them I hope!! Happy birthday boys and girls.

Sunday, 4 March 2012

Graphic 45 box, altered

I have decided to try and do all the 12 tags for 2012 from Tim Holtz and needed somewhere to try and keep them together, well that is the plan anyway. If they end up too 3d I will need to rethink but the idea is there. Anyway I found a Graphic 45 box that I covered in Tim paper, large clock faces, the inside I sprayed and distressed, along with the front. I then stuck tiny watch parts on the front - oh take a look and you will see.

Saturday, 3 March 2012

Stuff from the past..

I need something to do this afternoon so I have taken some photos of 2 embroideries I did some years ago - just to show I don't just mess with paper and ink! They both hang in our living room and are now over 20 years old. This is the first I did
and is my favourite. Both are from Dimensions kits and in crewel embroidery. The second is in finer wool and embroidery thread and had far more of the image pre done.
I will be back with more projects that are completed.

Saturday, 4 February 2012

I had a scrappy time

I spent last Saturday making a start on the wedding album and then cut the titles on the Eclips and did a few more LOs during the week. I haven’t finished yet, I need some more photos so I will have to wait for them to arrive from Australia.


Here is what has been done so far.


The venue was at a hotel on the outskirts of Sittingbourne, the Bride arrived through this door so she wouldn’t see the Groom.


venue


arrive


car


As Debbie (the bride) wanted a red car Chris offered ours and we decked it out with ribbons and a posy on the rear shelf.


guys


The best man was a friend of Peter’s from Australia but he works in London right now.


bride


A soft focus photo of the bride, think this needs something else, maybe something to soften the edges of the mat.


ring


Self explanatory this one!


couplecelecrate


family


I need some more family photos to turn this into a 2 page LO.


meal1meal2

A double page of the table and some of the guests, I also need some of the other guests.


Finally for now, I took a couple of the photographer, he was brilliant and I though it important that they had some of him a swell.


camera